Tuesday, 30 July 2013

Dotticure: Dots, spots and polkadots

Hey gals

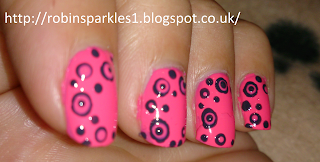
Here is a manicure I created Friday night whilst watching TV with the hubby.  I hadn't really tried much seriously with my dotting tools before (other than my leopard print) but decided that night was the night to practice and I am really pleased I did!

I used a Barry M Gelly polish for the base in colour grapefruit and used a Bourjois ultra shine polish in colour Bleu asphalte so some of the dots.

This is how it came out:

dotticure spots dots polkadots manicure pink grey blue

dotticure spots dots polkadots manicure pink grey blue


I would love to know your thoughts so please please leave comments below.

Until next time!

Robin Sparkles
Monday, 29 July 2013

DIY: How to make a fleece dog or cat bed (no sew)

diy how to make no sew dog cat pet bed fleece

 Hiya

Here is a blog to (try to) explain how to make a no sew fleece cat / dog bed. You will need the following:
  • Fleece fabric (or a soft comfy fabric of your choice)
  • Polyfill stuffing
  • Scissors (sharp)
Cut two identical size pieces of fabric the size you wish your bed to be and place them on top of each other. When cutting the size of your fabric remember to allow  approximately 5cm extra around the edge to allow for the seam.

diy how to make no sew dog cat pet bed fleece

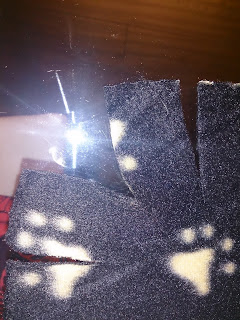
 Working your way around the edge of the bed cut 5cm long slits in the two layers of fabric.  Space these out approximately 3cm apart.

diy how to make no sew dog cat pet bed fleece

Cut the corners off entirely as they will only get in the way when making the knots.  You should now have something that looks like this!

diy how to make no sew dog cat pet bed fleece

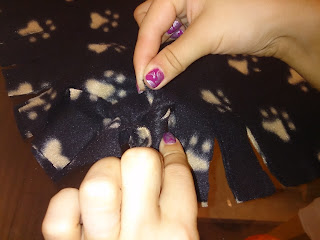
Next, you want to start tying knots with the tab of the top piece of fabric and the tab of the bottom piece of fabric.  Take one of the tabs of the top piece of fabric in one hand and the corresponding tab from the bottom piece of fabric in the other and tie a single knot with them together.  Work your way around the whole bed leaving a corner open ready for stuffing!

diy how to make no sew dog cat pet bed fleece

diy how to make no sew dog cat pet bed fleece


diy how to make no sew dog cat pet bed fleece

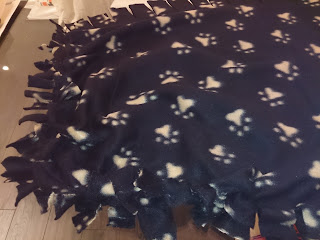
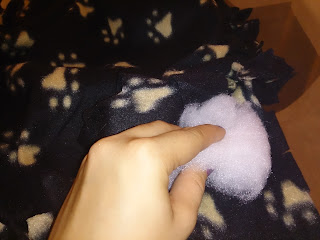
Now take your stuffing and put it inside via the corner you have not tied up yet. Pack it out (you will need a lot of stuffing) but be careful not to make it too rigid so that it is soft and comfy for your dog or cat.

diy how to make no sew dog cat pet bed fleece

The brilliant thing about the knot system is that if you want to wash the bed, you can just untie it, take the stuffing out and wash the fabric!

Anywho, that is how I made my no sew cat / dog bed.  I hope you enjoyed this tutorial and enjoy making your own one.  Any questions please feel free to comment below and I shall do my best to ask.  Be sure to let me know how your project goes too!

Robin Sparkles

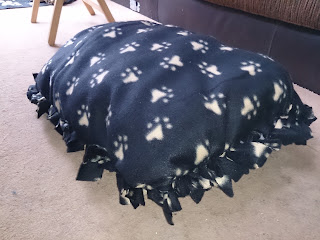
Side view:

diy how to make no sew dog cat pet bed fleece

Saturday, 27 July 2013

DIY: Crop top using leggings or tights (no sew)

Hi blogettes

This is a really quick post to tell you about something I tried out yesterday.  I had watched a couple of YouTube videos explaining how to do it and thought I would give it a whirl as it looked really simple.

YouTube video 1 click here
YouTube video 2 click here

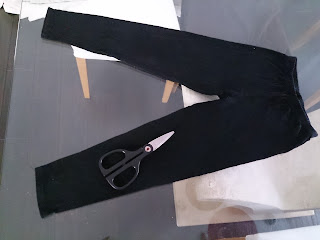
All you will need is a pair of leggings / tights and a pair of scissors!

diy how to make crop top from leggings or tights

Start my laying out your leggings/tights on a flat area and cut a length off the legs depending on how long you want the sleeves to be.  The leggings I used were fairly short in length anyway and gave the perfect 3/4 length sleeve so I left them as they were.

Then take your scissors and make a tiny snip in the middle of the crotch area.  Cut out a V neck or scoop neck shape depending on what neckline you would like your crop top to have, I went for something in between the two.

If you want it to have the same neckline on the baack then obviously cut the desired shape through both sides of the crotch area.  NOTE: Be careful not to cut too much at a time, you will be surprised how big the hole will get when you stretch it on to wear, you dont want your bra to be hanging out!...well maybe you do!

Voila! A recycled crop top from unwanted leggings or tights.  The fab thing is there are so many funky patterned leggings out there at the moment you can really go to town with crop tops too!


diy how to make crop top from leggings or tights

Let me know if you try this out and make your own crop top, I would love to know how yours comes out :0)

Robin Sparkles
Tuesday, 23 July 2013

Paisley nail stamp design - Bundle Monster BM-315

paisley purple silver nail stamp stamping bundle monster BM-315
 
paisley purple silver nail stamp stamping bundle monster BM-315

Hi girls
 
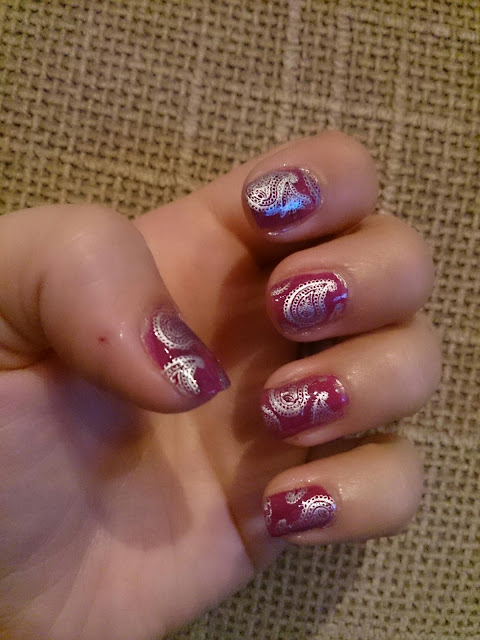
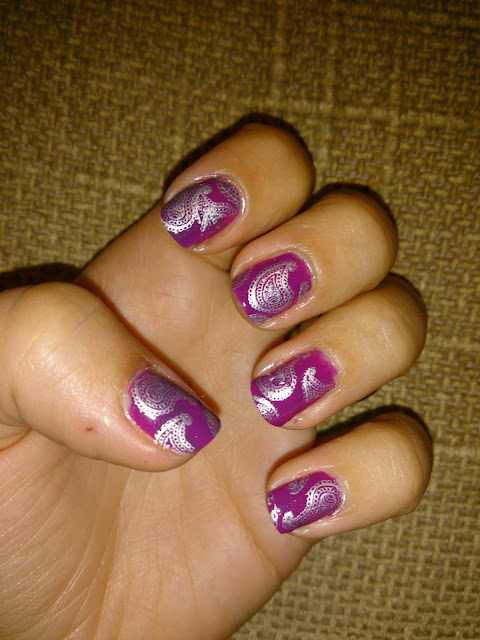
This evenings nail stamping design has been created using two motifs from the Bundle Monster nail stamping plate BM-315.
 
I mostly used the paisley design but did one nail with the strip design just because I wanted to try it out. My nails are too narrow for the strip design to take effect.
 
I did a coat of OPI nail envy strengthner. I then did a coat of Barry M bright purple. I then stamped the design using Barry M foil effects nail polish in silver.
 
Let me know what you think.
 
Robin Sparkles
Friday, 19 July 2013

DIY: How to make hair or head chains (as seen on Kim Kardashian)

head hair chains diy how to make silver chain kim kardashian

Hey girlies

This is a different type of post to my last few nail blogs.  This is to show you these funky head / hair chains I made myself that were inspired by the ones Kim Kardashian and Chloe Sims (TOWIE) have been seen wearing recently.

I found out how to do this from the brilliant blog Making It With Danielle and her diy how to post can be found here.

I made mine slightly shorter than the ones Kim Kardashian wears as I wanted them to fit round a bun as well as a ponytail.

head hair chains diy how to make silver chain kim kardashian
 
 
To make a head / hair chain like this you will need the following:
 
- Chains of various different styles (can be gold or silver) - I got mine off eBay.
- Assorted sizes of jump rings - again, I got mine from eBay.
- 9 hole silver / gold hair combs although I cut mine down with pliers to only 4 holes.
 
silver chains hair head jewellery diy how to make

silver jump rings hair head jewellery diy how to make
 
 
You can use as many chains as you like, I went for 4.  When cutting your combs, be sure to leave enough whole holes for the amount of chains you plan on using.
 
Cut your chains to differing lengths depending on whether you want them to come up longer or shorter (I went for shorter).  The lengths I used were:
 
- 24cm
- 28cm
- 31cm
- 35cm
 
Attach the chains to the holes of the hair comb using a jump ring of the correct size and pliers.
 
Voila! You have your very own DIY make it yourself head / hair chains :0)
 
Let me know if you use this tutorial to make your own and how they turn out.
 
Thanks for reading
 
Robin Sparkles


Freehand waterfall & leopard print nails design

nail art polish varnish waterfall leopard print nails


Hi blogettes

Todays nails are partly inspired by a fabulous waterfall nail art tutorial posted by the incredible The Nailasaurus.

I loved the look of these instantly and as they looked faiiiirrrly simple to do I gave it a go!  I followed Sam's instructions and used a 10mm brush that gets thinner at the tip.  I think I messed up a bit by using too many colours and lines, I should have just filled in the spaces and left it at that.  Still at least I have learnt for next time. 

For the other 2 nails I just really wanted to practice my leopard print as I hadnt done it for a while, hence the mis-match of designs!

nail art polish varnish waterfall leopard print nails

Let me know what you think.  Feel free to post links to your blog posts if you have tried out either of these style nail designs.

Robin Sparkles

nail art polish varnish waterfall leopard print nails
 
nail art polish varnish waterfall leopard print nails
 
Thursday, 18 July 2013

Barry M Nail Effects Jelly - No. 8 Grapefruit

barry m nail effects jelly 8 grapefruit pink neon polish varnish


Hiya

Just a quick blog from me to let you know about my exciting new purchase, my first "Jelly" polish from the Barry M nail polish range in number 8 grapefruit.

barry m nail effects jelly 8 grapefruit pink neon polish varnish

I absolutely love the polish colour although personally can't really notice the "jelly"ness of it very well.  It might be slightly shinier than a normal polish but that is about it.

barry m nail effects jelly 8 grapefruit pink neon polish varnish

The colour comes out a lot more neon and bright than it looked in the bottle but I love it all the same!

Do you own this polish? What do you think? Let me know in the comments below! <-- love a good rhyme!

Robin Sparkles

Ps. sorry they look a bit bodged, it was a rush job last night and I didn't let them dry properly. Major fail! Also, a bit of gel from my gel nails has still yet to come off a couple of fingers and I refuse to pull it off and ruin my nails anymore than they already are from them :0(

barry m nail effects jelly 8 grapefruit pink neon polish varnish


Photo with flash:-


barry m nail effects jelly 8 grapefruit pink neon polish varnish
Wednesday, 17 July 2013

Pinky pinkie - Nail stamping marble design – Bundle Monster BM-320


bundle monster bm-320 water marble marbling nail stamping stamp
 
 
Hi girlies

Today’s post is of a manicure I have been wearing for a couple of days now.  I stamped it using my trusted Bundle Monster nail stamping plates, the plate number I used is BM-320.

I started off with 3 coats of one of my all-time favourite nail polishes at the moment, OPI Pink Friday from their Nicki Minaj range.

I then used 2-3 Barry M nail polish colours and randomly dabbed them onto the nail stamping plate to try and create the effect of water marbling.  I also dabbed some dots using a dotting tool with Barry M foil effects in gold.  Didn’t come out wonderfully convincing but I am happy with it all the same.

If anyone else has used this plate please please comment below with a link to your blog posts, I would love to see what different designs people have been able to create! And obviously let me know what you think of mine in the comments below too :0)

Until next time blogettes!

Robin Sparkles
 
bundle monster bm-320 water marble marbling nail stamping stamp

bundle monster bm-320 water marble marbling nail stamping stamp
 
Tuesday, 9 July 2013

Aqua Marine Dolphin Nail Stamping with BM-320 Bundle Monster Plates


aqua marine dolphin nail stamping bundle monster stamp set bm-320
 
 
Hi girlies

Today I was just going to display and explain the stamping manicure I created at the weekend.  Well, I say “I created”, it was surprisingly my husband that picked the colours and the plate to use bless him!  He offered and I took him up on it somewhat dubiously and intrigued to see what he came up with, and I have to say I think he did pretty damn well!

I used Bundle Monster nail stamping plate BM-320, the dolphin and star nail stamping design.  The nail varnish / polish colours used were:


I hope you like this design and if you have this set of Bundle Monster nail stamping plates then you should give it a whirl! If you have a blog post using this nail stamp feel free to comment below with a link to your post, I would love to read it.


Until next time blogettes!

Robin Sparkles
Tuesday, 2 July 2013

HD Brows Palette – Perfect Brows


HD Eye and Brow Palette HD Brows Foxy Bombshell Vamp
 
 
Hi girls


As some of you may be aware from my previous blog post on the wonders of the HD Brow world I am an avid user and feel they really do produce flawless results.


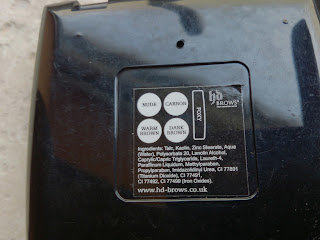
I have now invested in the HD Eye & Brow palette which consists of 4 shadow shades which I would like to review for you today.  It cost me £19.90 from the salon that I get my HD Brows done at. 


This palette comes in 3 different shade groups: Vamp; Bombshell and Foxy.  I was matched up by my HD Brow technician to the palette in the colour “Foxy”.
 
HD Eye and Brow Palette HD Brows Foxy Bombshell Vamp
 

You use the top left shade in the HD Brow Palette as a highlighter to highlight your brow bone / line.  I use the black in the top right corner of the HD Brow Palette as a smokey eye liner.  I was then advised that for the colour of my eye brows I should use a dab of each of the two bottom colours mixed together on my brush to line and fill in my brows.

 
HD Eye and Brow Palette HD Brows Foxy Bombshell Vamp


You get a cute little double ended brush which consists of a blending brush and an angled fine line brush to allow for precision when perfecting your brows.


These shadows do not only have to be used on your eye brows, you can also use them as eye shadows too.  I have been using the palette every day for about 3 months so far and haven’t really made a dent in it.  The initial cost is quite steep for 4 small shadows and I must admit I did put off getting it for a while but I truly am converted!


The only negative I would make is that I think for me the light highlighter shadow is useless and doesn’t show at all.  Other than that it gives my brows great definition in between my treatments and I couldn’t go out without wearing it now! How did I used to survive?!


Thanks for reading and feel free to leave any comments below.


Robin Sparkles

LinkWithin

You might also like:
 

Blog Design by Bonjour Belle Designs