Thursday, 28 June 2012

Laser Nail Art

Evening peeps!

Tonight i wanted to write a blog review about a nail painting technique that I have seen demonstrated by both Cute A.S Nails and Try to be Beautiful blogspots. It is called "Laser nail art".
I absolutely loved both posts I read on them and also the results that were produced so there was only one thing for it, I had to give it a go myself!

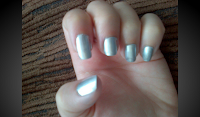
I started by painting by nails with 2 coats of Barry M silver foil efects nail varnish / polish. You must make sure you allow this to completely dry before moving into the next step.


Barry M silver foil effects nail varnish polish
Barry M silver foil effects nail varnish

Next, cut thin strips of cellotape and stick across your nail as if laser beams. Then use one or two other colours and fill in the gaps that are left around the cellotape? I used Rimmel London I love fruities lasting finish nail varnish in '025 Strawberry fizz' and Rimmel London lycra pro in '393 Desire'.

laser nail art
Nails with cellotape

 Allow this to completely dry before removing the cellotape from your nails. You should be left with a funky pattern like this!

Laser nail art
Laser nail art

I would love to read your comments or see links to your blogs if you have tried something similar. Hope this has been helpful :-)

Take care guys and thanks for reading.

Robin Sparkles

Laser nail art


Monday, 25 June 2012

Yarn Bombing - my yarn bomb is planted!

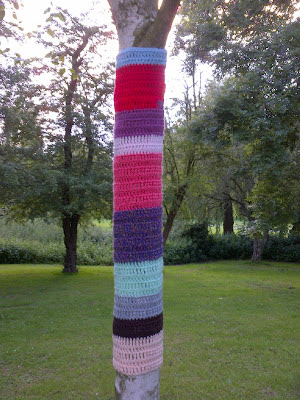
yarn bomb park tree
Yarn bomb - from a distance
Can you spot it?!


Hey guys

Just to give you a quick update on my first yarn bomb experience.  I went to a park near me on Friday evening (yep, my life is soooo rock 'n' roll!) and have managed to plant my first ever yarn bomb.

It may not look like much to some, but I am extremely proud of it and felt quite excited to leave it there and wonder what people will think or say when they see it.  I am going to create a second piece now and attach it below to cover the rest of the tree trunk.

I am hoping to go back this evening and check it has survived some pretty horrid weather over the weekend and shall let you know what I find.

All in all, my first yarn bombing experience gets a thumbs up from me! :0)  Feel free to comment below, I look forward to reading some.

Thanks for reading and take care.

Robin Sparkles

Yarn bomb tree sock
Yarn bomb tree sock

yarn bomb tree wool
Yarn bomb - close up
Friday, 22 June 2012

Yarn bombing - the next stage of my yarn bomb is complete!

Hey guys,

I just thought I would give you a quick update with where my yarn bomb is at.

As I told you in my last post about yarn bombing, I am going to try my first yarn bomb on a tree in my local park.

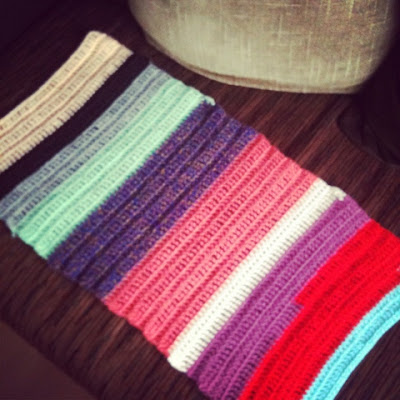
I have made my first piece which will be used to go round the trunk of the tree up to where the first branch stems out from. I will then make a further section to join that branch to the stem of the trunk and so on and so forth... Well this is in theory!

Anywho, here is my first piece:

yarn bombing knit crochet tree
Yarn bombing - finished piece ready to plant!


I am trying to keep the pieces as bright and colourful as possible so that it is a very fun and happy yarn bomb for people to see! :0)

I am hoping to go and plant my yarn bomb tonight so I will keep you updated with how I get on.

For now, take care guys.

Robin Sparkles


yarn bombing knit crochet tree
Yarn bomb - finished piece
Wednesday, 20 June 2012

Barry M Magnetic Nail Effects - NP328 Navy Blue

Hey dolls

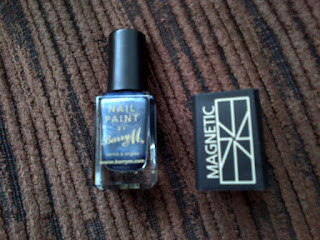
Today I am going to be reviewing Barry M Magnetic Nail Effects polish / varnish in colour NP328 (navy blue).  It is available in Boots stores in the UK for £4.99.

Barry M Magnetic nail effects navy blue polish varnish
Barry M Magnetic Nail Effects navy blue NP328

There are different pattern magnets for each shade / colour that this range of Barry M Magnetic Nail Effects nail polish comes in (definitely encourages you to buy all the shades so that you can mix and match the magnets!)  See photo below:

barry m magnetic nail effects polish varnish range
Barry M Magnetic Nail Effects colour range


You start by applying a base coat of the nail varnish without using the magnet.  Let this completely dry before applying the next coat.

Base coat - do not use the magnet

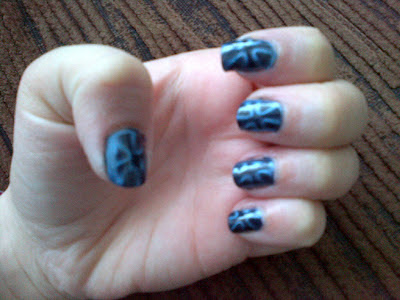
Apply the second coat of the polish and then take the magnet and hover it over your wet nail for 5 seconds. There is a raised ridge on the magnet for you to rest on the skin of your finger to help you avoid touching the magnetic onto your wet nail varnish.

barry m magnetic nail effects magnet


Voila, it really is as simple as that! :0)


Repeat this process until you have finished both hands.  It is then optional whether you decide to apply a clear nail varnish top coat (I personally don't normally bother to).

I hope that you have found this blog useful.  I would definitely recommend this product to people, I think they are fabulous and so effective.

Please feel free to share any links to your blogs regarding this product below, I would love to read them.

Take care guys and blog soon!

Robin Sparkles

barry m magnetic nail effects np328

barry m magnetic nail effects np328
Tuesday, 19 June 2012

Crystal Rhinestone Converse toe tops : How to crystalise your converse trainers

Hola lovely people

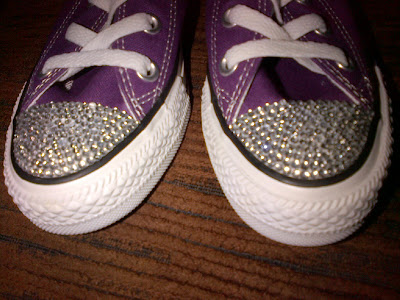
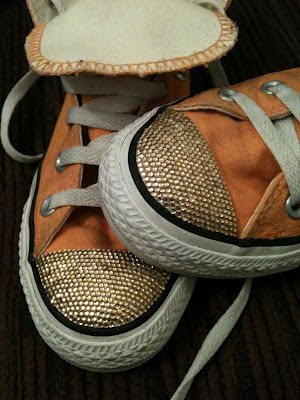
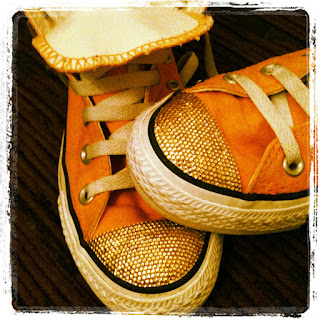
Tonight I have spent the evening crystalising the toe tops of my new Converse trainers using a different application method to the one I previously blogged about.  Here is the finished product:

Crystal rhinestone toe top Converse trainers
Crystal toe top Converse trainers
Everyone should have a go at making their own crystallised Converse trainers, it really is quite simple and soooo effective.

What you will need:
  •  Converse trainers (or similar)
  • Gem-Tac adhesive glue
  • Approximately x400 3mm crystal rhinestones (any colour of your choice)
  • Jewel setter / wooden cuticle stick
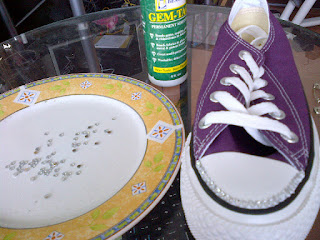
  • Plate to lay the crystals out on
You may notice that in the last blog on crystallising converse trainers I used 2mm crystal rhinestones, this is because I wanted to create a different more sparkly look.  They are just different styles and down to personal preference, you can use whatever size crystal you like, I am just telling you what I used if you want to achieve the same look as my photos.

Start by getting some glue on your jewel setter / cuticle stick:

crystal rhinestone converse trainers
Stage 1 - Crystallise converse toe tops

Run the glue end of the jewel setter along the edge of your toe top to make a thin line of glue:

crystal rhinestone converse trainers bling
Stage 2 - Crystallise converse toe tops

Pick up the crystals by touching the top of a crystal rhinestone with the tacky end of your jewel setter (glue end), place the crystal rhinestone onto the line of glue and position correctly by nudging it about until you are happy with its location.
crystal rhinestone converse trainers
Stage 3 - Crystal rhinestone converse trainers

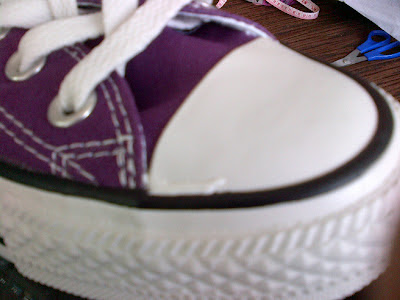
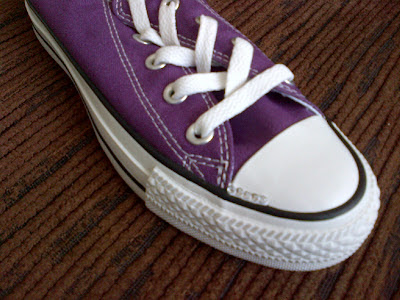
Continue this process all the way around the front edge of the toe top of your converse trainers.  Once the first line is done, leave this to completely dry before beginning to glue any future rows.  The first row is the most important as it forms the barrier that you will push all future rows of crystal rhinestones up against therefore it needs to be completely dry so make sure future rows stay straight.

crystal rhinestone converse trainers
Stage 4 - Crystal rhinestone converse trainers

Complete the second row of crystal rhinestones on your converse toe tops following exactly the same process a little bit at a time.  Be careful not to put too much glue down if you are still a beginner as it can start to dry pretty quickly so you do not want to get caught out! :0)

crystal rhinestone converse trainers
Stage 5 - Crystal rhinestone converse trainers

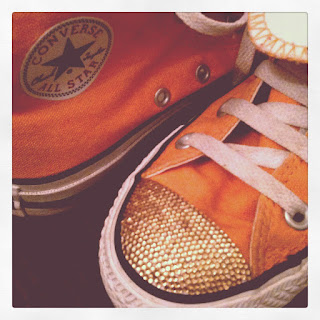
Continue this process again and again until you reach the centre of the toe top of your converse trainers.  Your completed converse trainers should look something like this ! (sorry the glue hadn't finished drying when I took the pic!) :

crystal rhinestone converse trainers
Stage 6 - Crystal rhinestone converse trainers


I hope you have enjoyed this blog and found it useful if you were thinking about crystallising your own converse trainer toe tops. Please feel free to comment below with any questions or links to your blog if you decide to attempt this project yourself.

Take care for now fellow bloggers.

Robin Sparkles

Ps. Stay organised by laying everything out neatly before you begin :0)

crystal rhinestone converse trainers how to

Hilariously funny sound cloud clip - This is what crazy looks like via text message

Hey guys

This is just a quick blog from me just to highly recommend that you click the link I am about to post and listen to the entire thing!

It is HILARIOUS!! I am still struggling to believe that people like this actually exist!

This is basically a New Zealand radio station reading out a very long string of text message conversation between a lady only known as JJ and a man called Kevin. They have had a one night stand and this is what happens the following day...

You will not regret that you listened and I am sure you will laugh as much as I did.

Please leave me comments on this post below and tell me what you thought!

http://soundcloud.com/vaughan-1-1/this-is-what-crazy-looks-like?utm_source=soundcloud&utm_campaign=mshare&utm_medium=facebook&utm_content=http%3A%2F%2Fsoundcloud.com%2Fvaughan-1-1%2Fthis-is-what-crazy-looks-like

comedy funny sound cloud


Monday, 18 June 2012

Yarn Bombing - Love it or loath it? Yarn Bomb Review

Hey guys

Today I want to talk about a craze that I have discovered called " Yarn Bombing " or to Yarn Bomb.  It is becoming ever more popular (especially over in the States) and people are getting more and more creative with what items / objects they are choosing to yarn bomb.


I am a bit of a crochet geek myself so as soon as I started discovering more and more images of yarn bombs all over the world I instantly wanted to have a go myself! :0)

I think the key is to start small! I was not going to kid myself into believing I could cover an entire Smart car or telephone box in my first yarn bomb hit!  I have decided to go for a tree trunk / branch for my first yarn bomb experience and am going to pick a tree in my local park.  I have been making a crochet patchwork type piece with as many bright colours as I can and will try to make it fairly long so that it covers a good portion of a tree trunk / branch.

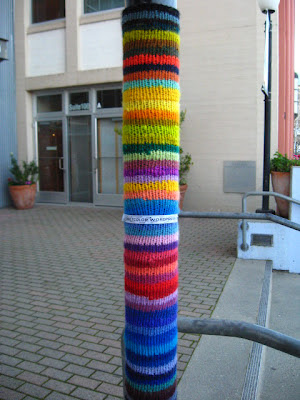
yarm bomb lamp post pole
Yarn bomb lamp post pole


The inspiration for my yarn bomb comes from this picture (although mine will not be as intricate as this! :o) ) :

yarn bombing tree trunk branch yarn bomb
Tree Yarn Bomb
Don't you think it looks crazy but just absolutely brilliant?! I certainly do, especially in winter when trees would otherwise be empty twigs.

There is a lot of discussions as to whether or not you should leave 'tags' / calling cards so that people can trace who left the yarn bomb or not and I guess it is just down to personal preference.  Some people may be so proud of their yarn bomb that they would love to hear from people that have admired their work and to discuss this craze that they love, whereas others may wish to keep their yarn bombing to themselves in the dark of the night and just enjoy their work anonymously.
If you were interested in creating a yarn bomb of your own, I came across this picture that might be a nice easy project to start with:

yarn bomb dock ring yarn bombing
How to Yarn Bomb
The picture above is a nice and easy guide for how to do a simply yarn bomb.  Again, I think this looks fantastic and it would certainly catch my eye if I was walking along that river.


I am going to leave you now with some favourite pictures I have discovered in my searches and hope that you enjoy them.  If you have done a yarn bomb of your own and have blog posts about it, please feel free to comment below with the links to your posts, I would love to see your work.
Thank you for reading and take care all.
Robin Sparkles

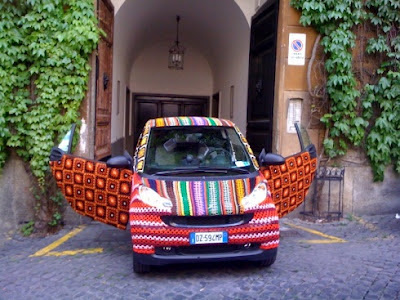
yarn bombing smart car yarn bomb
Yarn bombed Smart car

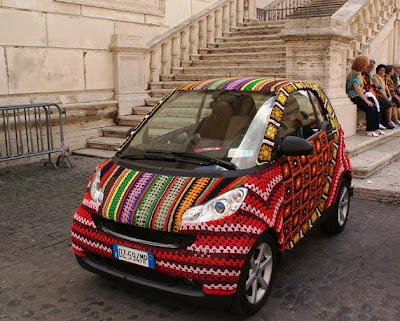
yarn bombing smart car yarn bombed
Yarn bombed Smart car

yarn bombing wall street bull bomb
Yarn bombed Wall Street Bull

yarn bomb london telephone box yarn bombing
Yarn bombed London telephone box

Tuesday, 12 June 2012

Instagram - What is your favourite lense / effect

Hey guys

Today I wanted to get peoples opinions on the craze that is Instagram .  I must admit that I love this app on my old iPhone so much that I have kept hold of my iPhone was well as my new Blackberry just so that I can use Instagram! (Unfortunately this app is crazy well not available on Blackberry App World - sort it out Blackberry!)

I have tried different apps on Blackberry that claim to do the same sort of thing but lets be honest, they don't come close to Instagram on iPhone / Android.

Do you have a favourite effect / lense that you like to use on Instagram? What do you like taking pictures of with Instagram?

Please comment below or share links to your blog with Instagram photos that you have posted.

Here are some of my own Instagram photos below :0) - let me know what you think.

Take care guys

Robin Sparkles

Castle instagram photo picture
Castle using Instagram

Hedge garden instagram photo
Hedge row using Instagram

Jubilee Cake Instagram Photo
Jubilee cake using Instagram
Sunday, 10 June 2012

Barry M Instant Nail Effects Silver Foil - Nail varnish / polish

Hey gals!

Today I have used a Barry M nail polish / varnish from the Instant Nail Effects Foil range.  The colour I chose today was Silver although this range is also available in Gold and newly added Lilac.

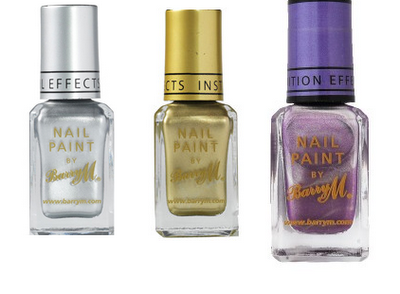
Barry M Instant Effects Silver Foil Nail Polish Varnish Paint
At this point I am going to say I absolutely love this range!! I picked this up for around £3.99 from my local Boots store and am so pleased I did.  I am a huge fan of ALL Barry M nail varnishes, I think they are great value for money and have so many brilliant effects and colours.

If you were using this Barry M silver foil nail paint in a hurry the colour I must say it looks fantastic with just one coat! Obviously for a more thorough look and if you have time I would definitely say to apply at least 2 coats, but the effect certainly shows through after just 1 coat.

Barry M Instant Effects Silver Foil Nail Polish Varnish Paint
Barry M Silver Foil Instant Effects Nail Polish

All in all this Barry M silver foil nail varnish / polish gets a huge thumbs up from me.  Such a brilliant striking effect for a night out or to wear to work.  I am very excited to use the Gold and Lilac from this range when I can get my hands on them as I am positive I will love them as much as I do the silver foil.

If you get a chance girlies, 100% buy some!

Feel free to leave comments below, and thanks for reading!

Robin Sparkles

Barry M Instant Effects Silver Foil Nail Polish Varnish PaintBarry M Instant Effects Silver Foil Nail Polish Varnish Paint
Saturday, 9 June 2012

Crystal Converse : How to Crystalise Toe Converse All Stars

Crystalise crystal rhinestone toe converse

Hey guys

This blog is to tell you about how I made my own crystalised toe cap converse. You just need the following:
  • A pair of converse
  • Crystal rhinestones in your desired colour and size (I used 2mm gold crystals but I believe 3mm are more popular - I just wanted extra twinkle!)
  • Gem-tac adhesive glue
  • Jewel setter / cuticle stick
I would say at this point it is also down to personal preference as two which method you want to use when sticking the crystals onto your Converse.  I chose to start with the straight edge across the width of the shoe, whereas some people prefer lining the C shaped edge of the top cap and working in C's over and over. 

If you choose to do the straight edge like I did the most important thing is the first line you do.  This will form the foundation of every other line you do and how straight the finished outcome will be.

Do the first row and leave that to completely dry before crystalising any further rows.  You will find that you use that first row as a guide and that you push all future lines up against the lsat to keep it straight.

Please feel free to comment below with any links to photographs of your attempts at making crystal toe cap Converse as I would love to see them.

I hope this blog post has been helpful in providing some tips and techniques to crystalising your own Converse. Give it a go, it is really fun! I shall leave you with some other photos of my crystal Converse.


Crystal rhinestone gem toe cap converse crystaliseCrystal rhinestone gem toe cap converse crystalisation
Take care guys

Robin Sparkles
Friday, 8 June 2012

How to crystalise shoes / heels - My very own crystalised bling diamante rhinestone shoes

crystal shoe heel

The world of crystalisation is taking over! I must admit, when ever the girlie piece of my heart sees a gorgeous pair of shoes with a crystalised heel it makes me go 'aaahhh'!

I looked around at some different websites and companies that I follow on twitter to investigate how much a pair of these gorgeous heels would cost me.  Unfortunately for me, my purse was never going to stretch to, in some cases, £100 plus so I decided that I would have to take it upon myself to make some.
Don't get me wrong, I understand why people are charging what they are for them, it is very time consuming and they certainly put in the hours to make such wonderful creations but it just wasn't in my price range.

This is my "How to crystalise shoes / heels" blog post.  May I just add at this point literally ANYONE can do it, it is not difficult, you just need the following:-
  • A pair of shoes / heels to crystalise
  • Rhinestone crystals in your preferred sizes & colours
  • Gem-Tac adhesive glue
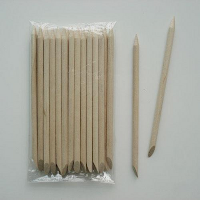
  • A disposal wooden cuticle stick or something similar (I used a jewel setter but you don't have to go to that expense)
  • Plate to lay your crystals out on
  • Patience!
Wooden Cuticle SticksGem-Tac Glue

I started off by treating myself to a pair of platform black shoes from a high street store and ordered multi-coloured crystals in lots of different sizes from a seller on eBay.  I had 8mm, 6mm, 5mm, 4mm, 3mm, 2mm, & 1mm as I found they were really handy to fill in the small spaces that would otherwise be the black of the shoe.

Crystalisation process

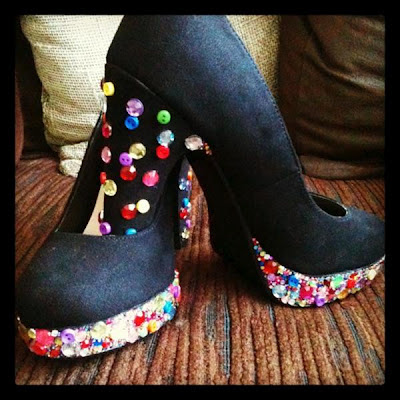
Start with the biggest size crystals, in my case this was the 8mm.  I began with individually sticking these crystals onto the shoe at random places by hand. (In my case it was buttons as I used these as well as crystals but you don't have to). I then also stuck the 8mm crystals on the same way as the buttons.

Crystal button shoes


After the biggest ones are on, it is literally a case of putting some glue onto the shoe, a small area at a time, and sticking random sized crystals onto the glue.  It is important that you do only cover small areas of the shoe at a time, especially if you are new to crystalising, as the glue can dry and become tacky very quickly.

Layout some of each size crystal onto a plate.  I found that it helped to try and keep each size together so that you can easily identify what you need once you get in the flow of it! :0)

Dab a bit of glue onto the pointed end of the stick / jewel setter and pick up individual crystals at a time.  You will find that when you dab the crystal onto the glue on the shoe, it shall come off the end of the stick and stay set on the shoe.  It is best to be as random as possible when picking up colours and sizes to help with the effect.  Obviously when a gap is appearing that fill fit a smaller crystal, just pop one in the space.

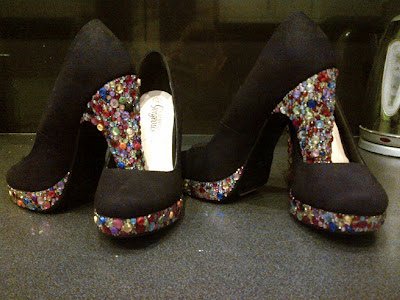
Continue this method over the entire area of the shoe you wish to crystalise (I did the platform of the shoe and the heel of the shoe) until your work is complete.

Here are some photos of the various stages my shoes went through:

Crystal button heel platform shoes

Crystal heel platform shoes

Crystalise heel platform shoes

I hope that you have found this blog post helpful.  If you decide to make your own shoes, please feel free to comment below with links to your photos, I would love to see them.

Remember, I chose to use multicoloured crystals but you can use any colour scheme you wish. Maybe just pinks and purples, or blacks and silvers, it really is down to personal preference.

These shoes are guaranteed to get people commenting and asking you where you got them from, and you will have the pleasure of saying they are unique and that you made them yourself! Hehe.  My friend saw mine and liked them so much that she had me make her a pair too!

Feel free to comment on this blog with any questions you have.

Thanks for reading! :0)

Robin Sparkles xxx

Crystalise crystal rhinestone heel shoes
Crystal rhinestone gem heel platform shoes
Crystal gem rhinestone heel platform shoes


LinkWithin

You might also like:
 

Blog Design by Bonjour Belle Designs